Introduction
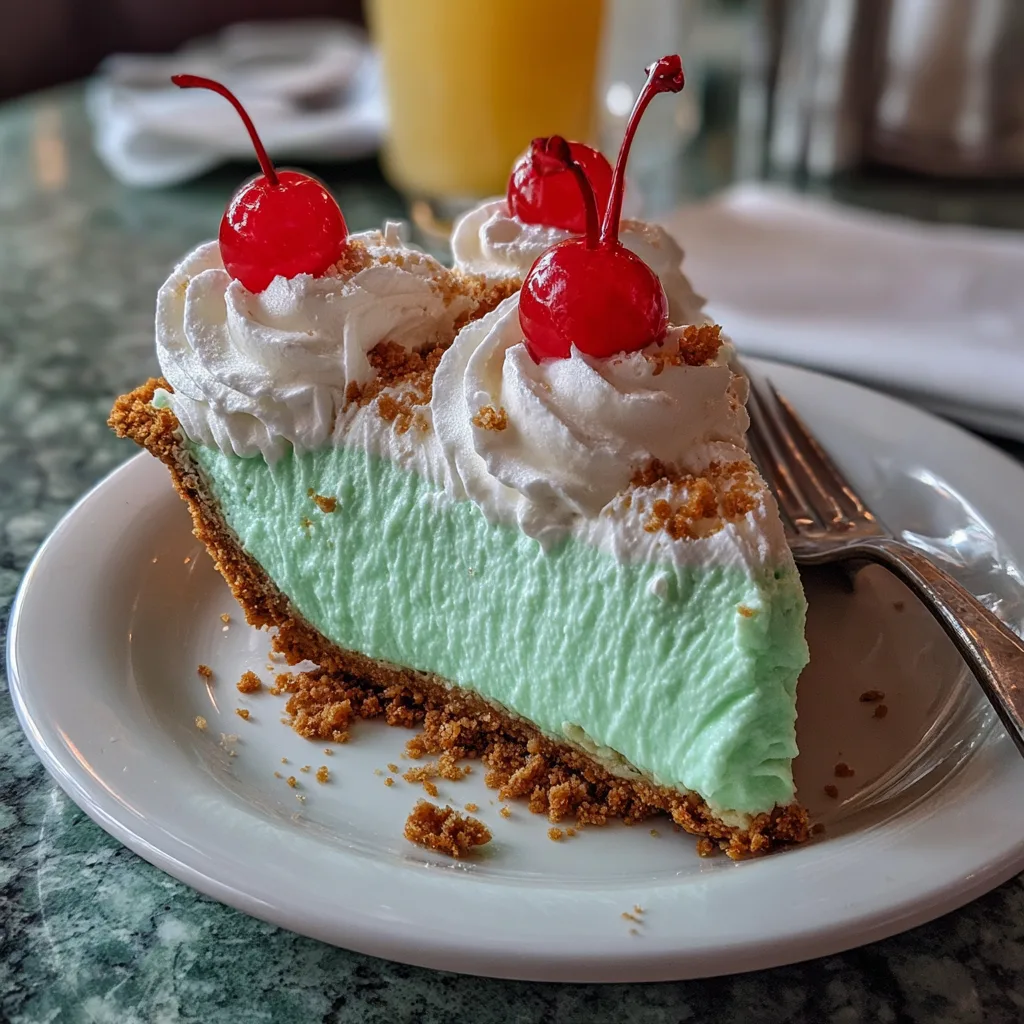
Shamrock Shake Pie is a festive, creamy dessert inspired by the iconic mint-flavored milkshake that appears each spring. With its cool peppermint flavor, fluffy texture, and chocolate cookie crust, this pie delivers refreshing sweetness in every slice. The vibrant green color makes it especially fun for holiday celebrations, yet the flavor is delicious year-round for anyone who enjoys mint and chocolate together. The first time I made this pie, I was looking for a simple no-bake dessert that still felt special, and it exceeded expectations. It requires minimal effort yet looks impressive when sliced and served. The smooth, mousse-like filling pairs beautifully with the crisp cookie crust, creating the perfect balance of textures. Whether you are hosting a gathering or simply craving a minty treat, Shamrock Shake Pie is an easy and delightful option.
Print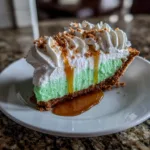
Shamrock Shake Pie – A Creamy, Minty No-Bake Dessert Inspired by a Classic Treat
- Total Time: 4 hours 20 minutes
- Yield: 8 slices
- Diet: Vegetarian
Description
Shamrock Shake Pie is a creamy no-bake dessert inspired by the classic minty milkshake, featuring a smooth mint cheesecake filling in a chocolate cookie crust topped with whipped cream.
Ingredients
- 24 chocolate sandwich cookies, crushed
- 5 tablespoons unsalted butter, melted
- 8 oz cream cheese, softened
- 1/2 cup granulated sugar
- 1 teaspoon peppermint extract
- 4–5 drops green food coloring
- 1 1/2 cups whipped topping (plus extra for garnish)
- 1/2 cup mini chocolate chips
Instructions
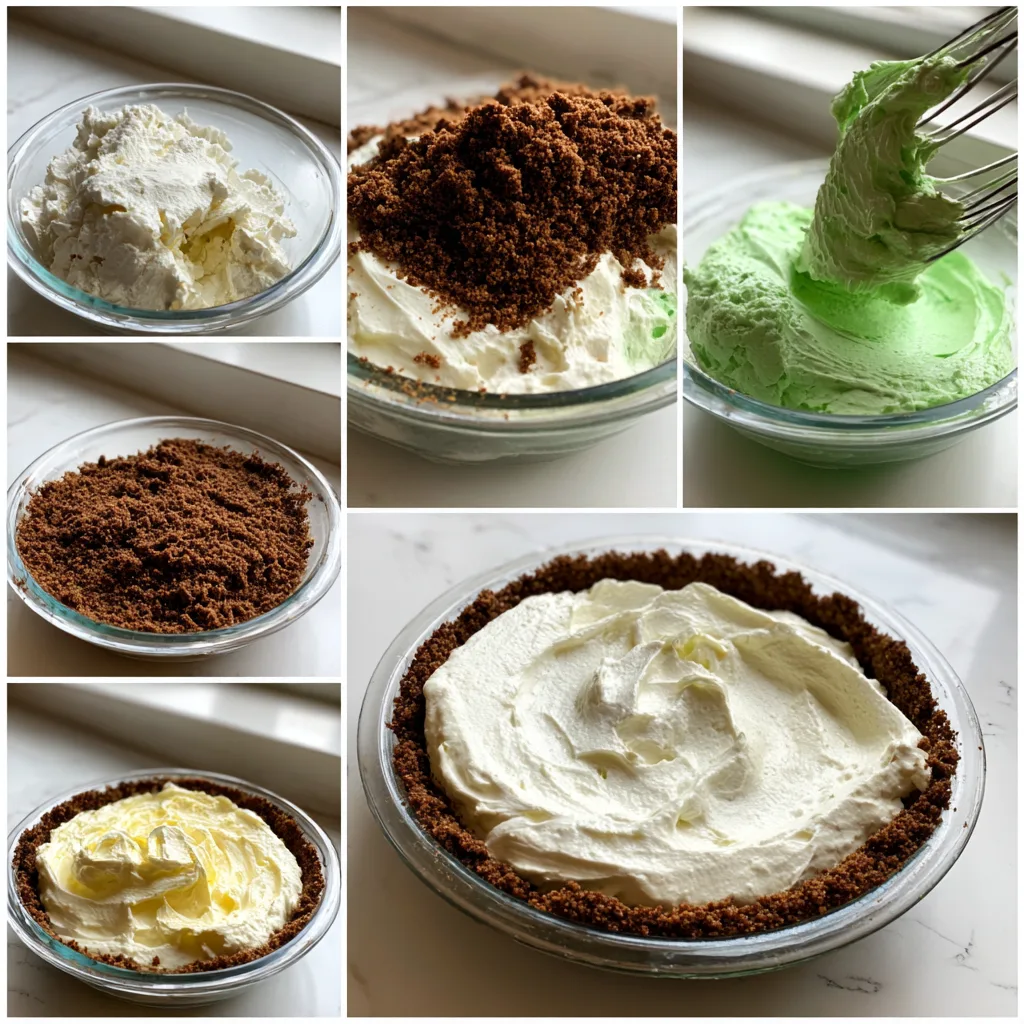
- In a bowl, combine crushed chocolate cookies and melted butter until evenly coated.
- Press mixture firmly into the bottom and sides of a 9-inch pie dish to form the crust. Chill for 30 minutes.
- In a mixing bowl, beat cream cheese and sugar until smooth and creamy.
- Add peppermint extract and green food coloring; mix until evenly combined.
- Fold in whipped topping and mini chocolate chips gently.
- Spread the filling evenly into the chilled crust.
- Refrigerate for at least 4 hours, or until set.
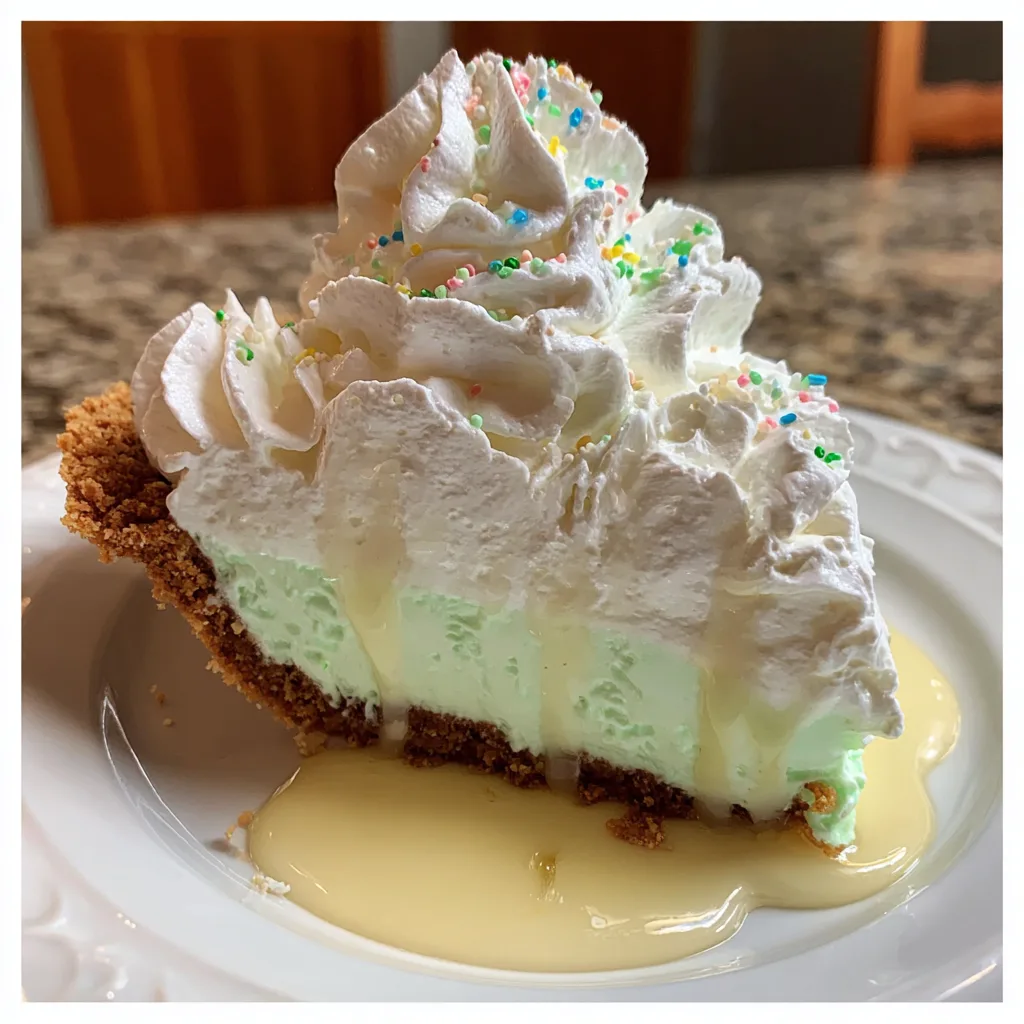
- Garnish with additional whipped topping and chocolate chips before serving.
Notes
- Adjust peppermint extract to taste for stronger or milder mint flavor.
- For a firmer pie, freeze for 1–2 hours before serving.
- Store covered in the refrigerator for up to 4 days.
- Use an Oreo-style crust for extra chocolate flavor.
- Prep Time: 20 minutes
- Cook Time: 0 minutes
- Category: Dessert
- Method: No-Bake / Chilling
- Cuisine: American
Why You’ll Love This Recipe
This no-bake pie is quick to assemble, requires simple ingredients, and offers refreshing mint flavor with a creamy texture. It is perfect for celebrations, easy to prepare ahead of time, and ideal for anyone who loves mint-chocolate desserts.
Ingredients
(Tip: You can find the complete list of ingredients and their measurements in the recipe card below.)
Chocolate sandwich cookies form the base of the crust, providing rich cocoa flavor and crisp texture.
Unsalted butter binds the cookie crumbs together to create a firm crust.
Cream cheese gives the filling structure and slight tang that balances the sweetness.
Powdered sugar sweetens the filling while maintaining a smooth consistency.
Whipped topping creates a light, airy texture that mimics a milkshake.
Peppermint extract provides the signature cool mint flavor.
Green food coloring gives the pie its classic vibrant appearance.
Heavy cream can be whipped for additional stability and richness if desired.
Chocolate chips add texture and enhance the mint-chocolate combination.
Directions
Begin by crushing the chocolate sandwich cookies into fine crumbs using a food processor or by placing them in a sealed bag and crushing with a rolling pin. Mix the crumbs with melted butter until evenly combined.
Press the mixture firmly into the bottom and sides of a pie dish to form the crust. Chill in the refrigerator for at least 30 minutes to set.
In a large mixing bowl, beat the cream cheese until smooth. Add powdered sugar and continue mixing until fully incorporated and creamy.
Fold in whipped topping gently to maintain a light texture. Stir in peppermint extract and a few drops of green food coloring until the desired shade is achieved. Mix in chocolate chips if using.
Spread the filling evenly into the chilled crust, smoothing the top with a spatula. Refrigerate for at least 4 hours, or until fully set.
Before serving, garnish with additional whipped topping or chocolate shavings if desired.
Equipment needed :
Must-Have Tools to Get Rolling
Here’s what you’ll want to have on hand:
Here’s what you’ll want to have on hand:
Silicone Spatula – Durable, heat-resistant silicone spatula perfect for mixing, scraping, and spreading. Gentle on non-stick cookware and easy to clean.
Large pot – You’ll need this to boil the whole cabbage head and soften the leaves.
large bowl –Spacious, durable large bowl ideal for mixing, serving, or food preparation. Made from sturdy material and easy to clean.
Sharp knife – For coring the cabbage and slicing out the thick stem in each leaf. A paring knife works best.
Mixing bowl – A big bowl makes it easier to combine your meat and rice filling evenly.
Cutting board – For prepping cabbage leaves and rolling them like a pro.
Full-Size Blender – is a powerful kitchen appliance for making smoothies, soups, and sauces in large batches.
3-in-1 Air Fryer – This versatile 3-in-1 air fryer offers Air Fry for healthier meals with less oil, Bake for bakery-quality desserts and treats, and Reheat to bring leftovers back to life with crispy, flavorful results
Servings and timing
Servings: 8 slices
Preparation time: 20 minutes
Chilling time: 4 hours
Total time: 4 hours 20 minutes
Storage/reheating
Store the pie covered in the refrigerator for up to 4 days. For longer storage, freeze for up to 1 month and thaw in the refrigerator before serving. This dessert is best served chilled and should not be reheated.
Variations and Customizations
For a more intense chocolate flavor, add a thin layer of melted chocolate over the crust before adding the filling. I once incorporated crushed mint candies into the filling, which added a subtle crunch and enhanced the peppermint flavor.
You can substitute homemade whipped cream for store-bought whipped topping for a fresher taste. Adjust the amount of peppermint extract carefully, as it can be strong.
For a lighter version, use reduced-fat cream cheese. A graham cracker crust can replace the chocolate cookie crust if you prefer a milder base flavor.
Adding a drizzle of chocolate ganache over the top before chilling creates a beautiful finish and deeper chocolate contrast.
Nutrition and Dietary Info
Approximate values per serving:
| Nutrient | Amount |
|---|---|
| Calories | 410 kcal |
| Protein | 4 g |
| Carbs | 45 g |
| Fat | 24 g |
| Saturated Fat | 14 g |
| Fiber | 1 g |
| Sugar | 32 g |
| Sodium | 280 mg |
This dessert is vegetarian and can be adjusted with lower-fat dairy options if desired.
Expert Tips & Customizations
Chill Thoroughly
Allow enough time for the pie to fully set before slicing.
Use Room Temperature Cream Cheese
This ensures a smooth, lump-free filling.
Add Extract Gradually
Peppermint extract is strong, so start small and adjust carefully.
Press Crust Firmly
A compact crust prevents crumbling when slicing.
FAQs
Can I make this pie ahead of time?
Yes, it is ideal for preparing a day in advance.
Can I freeze Shamrock Shake Pie?
Yes, freeze tightly covered and thaw in the refrigerator before serving.
How do I prevent the filling from being too soft?
Ensure adequate chilling time and use full-fat cream cheese for stability.
Can I use fresh whipped cream instead of whipped topping?
Yes, stabilize it with a small amount of powdered sugar for best results.
Is the green food coloring necessary?
No, it is optional and used mainly for visual appeal.
How strong is the mint flavor?
The flavor is refreshing but not overpowering; adjust extract to taste.
Conclusion
Shamrock Shake Pie is a creamy, refreshing dessert that captures the nostalgic mint-chocolate flavor of a beloved seasonal treat. Easy to prepare and perfect for celebrations, it combines smooth filling with a crisp cookie crust for a balanced and satisfying dessert. With its vibrant appearance and cool flavor, it is sure to become a festive favorite.
Hungry for more? Visit our website for full recipes and follow us on Pinterest for daily foodie inspo you’ll love to pin!