
Introduction
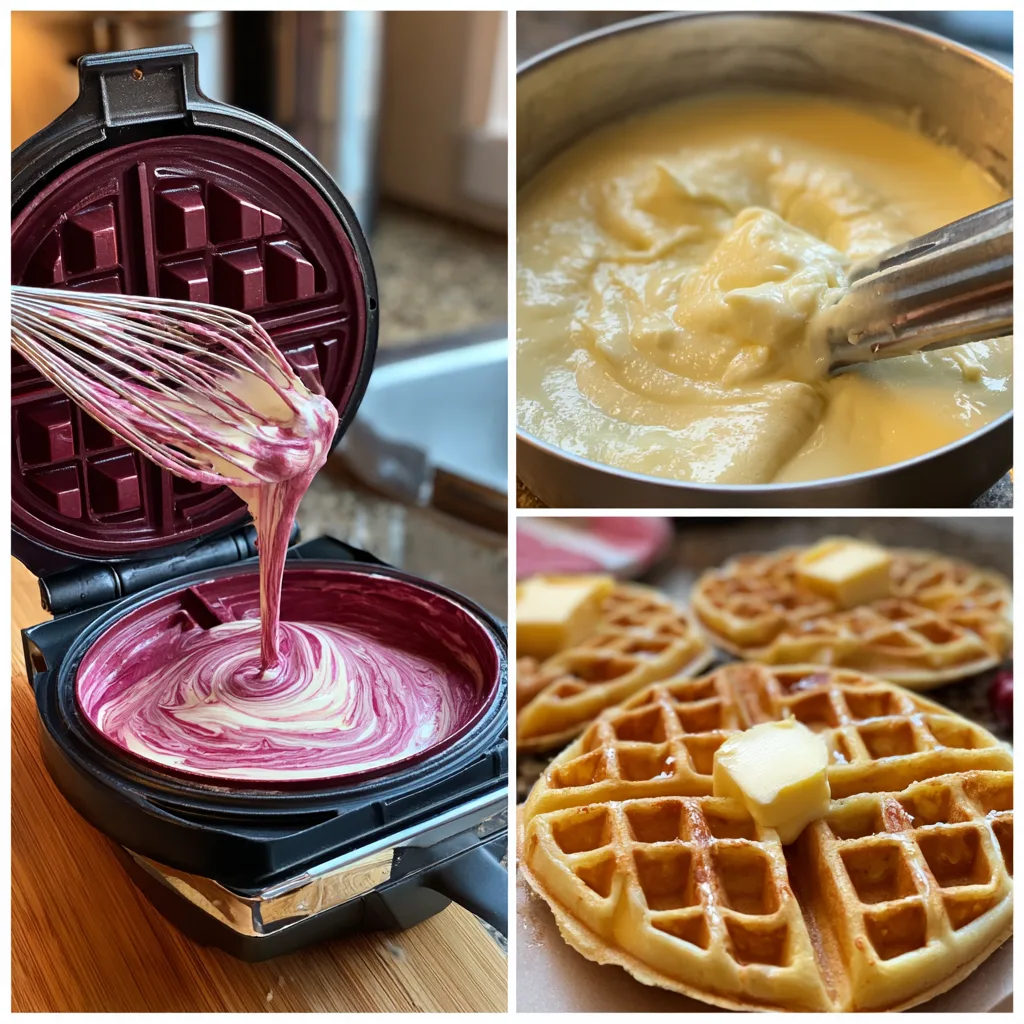
Red Velvet Marble Waffles bring a sense of occasion to the breakfast table with their dramatic color, soft texture, and lightly chocolatey flavor. These waffles combine classic vanilla batter with red velvet batter, swirled together to create a beautiful marbled effect that looks impressive without being difficult to achieve. I first made these waffles for a weekend brunch when I wanted something playful yet elegant, and they immediately became a standout. The waffles are crisp on the outside, tender on the inside, and subtly sweet, making them perfect for both sweet toppings and simple finishes. Whether served for a special breakfast, brunch gathering, or festive morning, these waffles offer visual appeal and comforting flavor in equal measure. They feel indulgent while remaining approachable, which makes them a joy to prepare and serve.
Print
Red Velvet Marble Waffles – A Striking, Tender Breakfast Treat
- Total Time: 25 minutes
- Yield: 6 waffles
- Diet: Vegetarian
Description
Fluffy red velvet marble waffles with swirls of classic vanilla batter, offering a rich cocoa flavor and vibrant color perfect for a special breakfast or brunch.
Ingredients
- 2 cups all-purpose flour
- 2 tbsp cocoa powder
- 1/4 cup granulated sugar
- 1 tbsp baking powder
- 1/2 tsp salt
- 2 large eggs
- 1 3/4 cups milk
- 1/3 cup vegetable oil or melted butter
- 1 tsp vanilla extract
- 1 tbsp red food coloring
- 1/2 tsp white vinegar
Instructions
- Preheat waffle iron according to manufacturer instructions.
- In a large bowl, whisk flour, sugar, baking powder, and salt.
- In another bowl, whisk eggs, milk, oil, and vanilla.
- Combine wet and dry ingredients until just mixed.
- Divide batter in half; mix cocoa powder, red food coloring, and vinegar into one half.
- Pour alternating spoonfuls of red velvet and plain batter onto waffle iron.
- Gently swirl with a toothpick for a marble effect.
- Cook until waffles are crisp outside and fluffy inside.
- Serve warm with syrup, whipped cream, or fresh berries.
Notes
- Do not overmix batter to keep waffles light.
- Adjust food coloring for desired color intensity.
- Waffles can be frozen and reheated in a toaster.
- Prep Time: 10 minutes
- Cook Time: 15 minutes
- Category: Breakfast
- Method: Waffle Iron
- Cuisine: American
Why You’ll Love This Recipe
These waffles are visually stunning, soft yet crisp, and easy to make with pantry ingredients. The marbled design elevates a familiar breakfast favorite into something memorable and special.
Ingredients
(Tip: You can find the complete list of ingredients and their measurements in the recipe card below.)
All-purpose flour
Flour provides structure and ensures the waffles hold their shape while remaining tender.
Granulated sugar
Sugar lightly sweetens the batter and enhances browning during cooking.
Baking powder
Baking powder creates lift, giving the waffles a light and airy interior.
Salt
Salt balances sweetness and enhances overall flavor.
Cocoa powder
Cocoa powder adds the subtle chocolate note characteristic of red velvet.
Eggs
Eggs bind the ingredients and contribute richness and structure.
Milk
Milk hydrates the batter and creates a smooth, pourable consistency.
Unsalted butter
Melted butter adds richness and helps create crisp edges.
Vanilla extract
Vanilla rounds out the flavor and complements both batters.
Red food coloring
Red food coloring gives the waffles their signature red velvet appearance.
White vinegar
Vinegar enhances the red velvet flavor and reacts with baking powder for tenderness.
Directions
Preheat the waffle iron according to the manufacturer’s instructions. In a large bowl, whisk together flour, sugar, baking powder, and salt.
In a separate bowl, whisk eggs, milk, melted butter, and vanilla extract until smooth. Add the wet ingredients to the dry ingredients and mix gently until just combined.
Divide the batter evenly between two bowls. In one bowl, whisk in cocoa powder, red food coloring, and vinegar to create the red velvet batter. Leave the other batter plain.
Lightly grease the waffle iron. Spoon alternating dollops of red velvet and vanilla batter onto the iron, then gently swirl with a skewer or spoon to create a marbled effect. Close the lid and cook until the waffles are crisp and cooked through.
Remove carefully and repeat with remaining batter. Serve warm.
Equipment needed
Must-Have Tools to Get Rolling
Here’s what you’ll want to have on hand:
Silicone Spatula – Durable, heat-resistant silicone spatula perfect for mixing, scraping, and spreading. Gentle on non-stick cookware and easy to clean.
Large pot – You’ll need this to boil the whole cabbage head and soften the leaves.
large bowl –Spacious, durable large bowl ideal for mixing, serving, or food preparation. Made from sturdy material and easy to clean.
Sharp knife – For coring the cabbage and slicing out the thick stem in each leaf. A paring knife works best.
Mixing bowl – A big bowl makes it easier to combine your meat and rice filling evenly.
Cutting board – For prepping cabbage leaves and rolling them like a pro.
Full-Size Blender – is a powerful kitchen appliance for making smoothies, soups, and sauces in large batches.
3-in-1 Air Fryer – This versatile 3-in-1 air fryer offers Air Fry for healthier meals with less oil, Bake for bakery-quality desserts and treats, and Reheat to bring leftovers back to life with crispy, flavorful result
Servings and timing
This recipe makes approximately 6 waffles. Preparation takes about 15 minutes, cooking takes 15 minutes, and total time is approximately 30 minutes.
Storage/reheating
Store leftover waffles in an airtight container in the refrigerator for up to three days. Reheat in a toaster or oven until crisp. Avoid microwaving, as it softens the texture.
Variations and Customizations
Red Velvet Marble Waffles are easy to adapt. You can add chocolate chips to the red velvet batter for extra indulgence. For a lighter flavor, reduce the cocoa powder slightly. Cream cheese glaze, whipped cream, or fresh berries pair beautifully as toppings. If you prefer a less sweet waffle, reduce the sugar and rely on toppings for sweetness. For a festive twist, serve with colored sprinkles or flavored syrups. These variations allow you to customize the waffles while preserving their striking marbled appearance.

Nutrition and Dietary Info
| Nutrient | Amount per Serving |
|---|---|
| Calories | 310 kcal |
| Protein | 7 g |
| Carbs | 38 g |
| Fat | 14 g |
| Saturated Fat | 8 g |
| Fiber | 1 g |
| Sugar | 12 g |
| Sodium | 290 mg |
Expert Tips & Customizations
Do not overmix
Overmixing can make the waffles dense instead of tender.
Swirl gently
Too much swirling blends the batters and removes the marbled effect.
Preheat fully
A hot waffle iron ensures crisp edges and even cooking.
Serve immediately
Fresh waffles have the best texture and appearance.
FAQs
Do red velvet waffles taste like chocolate?
They have a mild chocolate flavor rather than a strong cocoa taste.
Can I make the batter ahead of time?
It is best used fresh, but it can be refrigerated for up to 12 hours.
Can I freeze these waffles?
Yes, freeze fully cooked waffles and reheat in a toaster.
Is food coloring necessary?
No, but it provides the signature red velvet look.
Can I make these waffles dairy-free?
Yes, substitute plant-based milk and butter alternatives.
What toppings work best?
Cream cheese glaze, powdered sugar, berries, or maple syrup pair well.
Conclusion
Red Velvet Marble Waffles are a beautiful and flavorful way to elevate breakfast or brunch. With their crisp exterior, tender interior, and striking marbled design, they offer both visual appeal and comforting flavor. Perfect for special mornings or creative weekend cooking, this recipe is sure to become a favorite whenever you want something a little extra special.
Hungry for more? Visit our website for full recipes and follow us on Pinterest for daily foodie inspo you’ll love to pin!