Introduction
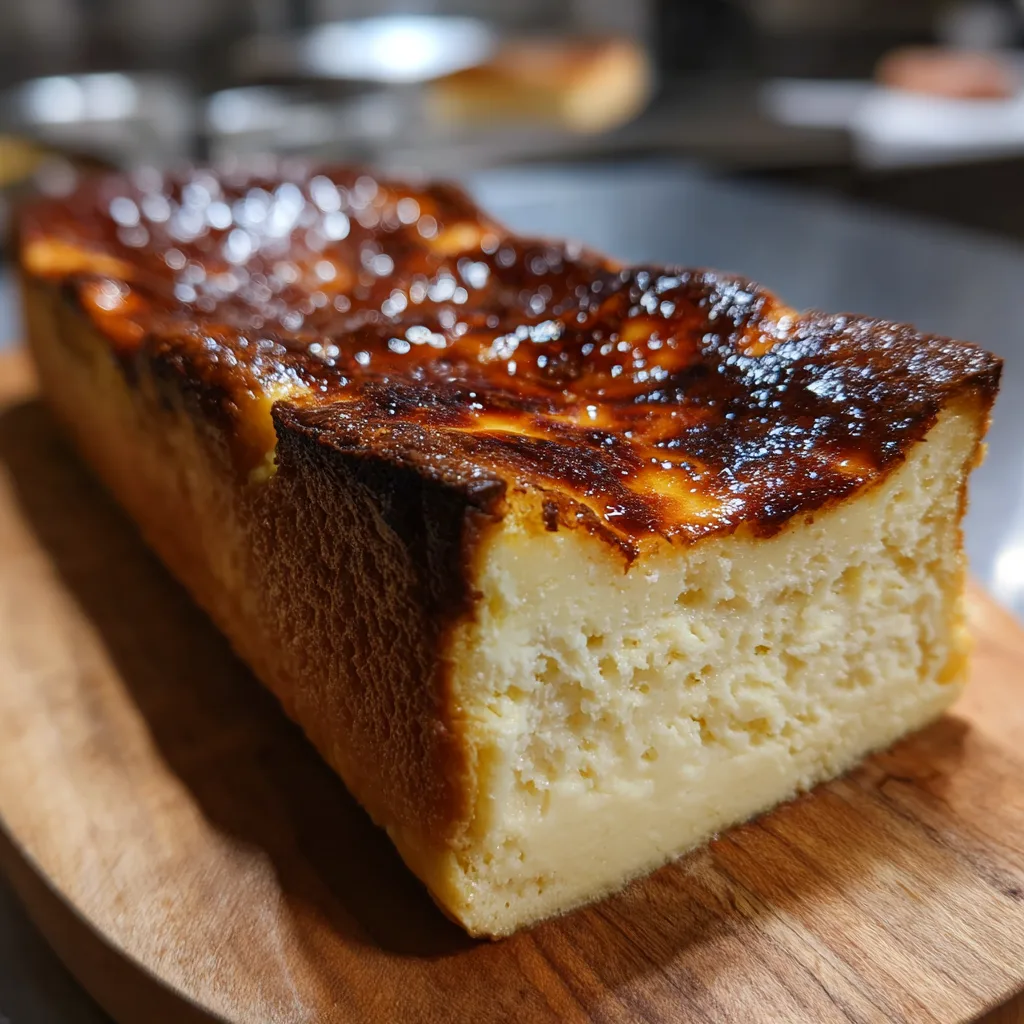
Burnt Basque Cheesecake has become one of the most beloved desserts in recent years thanks to its rustic look, caramelized top, and incredibly creamy interior. Unlike traditional cheesecakes that require careful baking and a water bath, this Spanish-style cheesecake embraces imperfection. The dark, almost burnt surface is actually the signature feature that gives the dessert its deep caramel flavor.
Originally created in San Sebastián, Spain, this cheesecake is known for its rich texture and slightly custardy center. Making it in a loaf pan instead of a traditional round pan makes it perfect for smaller households or when you want a manageable portion without sacrificing flavor.
I personally love this loaf pan version because it’s easier to slice and store. I once experimented with using slightly softened cream cheese straight from the fridge and it still turned out wonderfully creamy. That’s the beauty of this recipe—it’s forgiving and simple.
If you’re looking for a dessert that feels gourmet but requires minimal effort, this Burnt Basque Cheesecake in a Loaf Pan is exactly what you need.
Print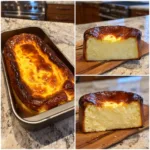
Burnt Basque Cheesecake in a Loaf Pan
- Total Time: 4 hours 50 minutes
- Yield: 8 slices
- Diet: Vegetarian
Description
Burnt Basque Cheesecake in a Loaf Pan is a small-batch version of the famous crustless Spanish cheesecake with a deeply caramelized top, creamy custardy center, and rich tangy flavor.
Ingredients
- 450 g (16 oz) cream cheese, softened
- 120 g (1/2 cup) granulated sugar
- 2 large eggs, room temperature
- 240 ml (1 cup) heavy cream
- 1 tsp vanilla extract
- 1/4 tsp salt
- 15 g (2 tbsp) all-purpose flour
- Butter or oil for greasing the pan
Instructions
- Preheat the oven to 220°C (425°F). Line a loaf pan with parchment paper, leaving excess hanging over the sides.
- In a large bowl, beat the softened cream cheese and sugar together until completely smooth and creamy.
- Add the eggs one at a time, mixing well after each addition.
- Pour in the heavy cream and vanilla extract, mixing until fully incorporated.
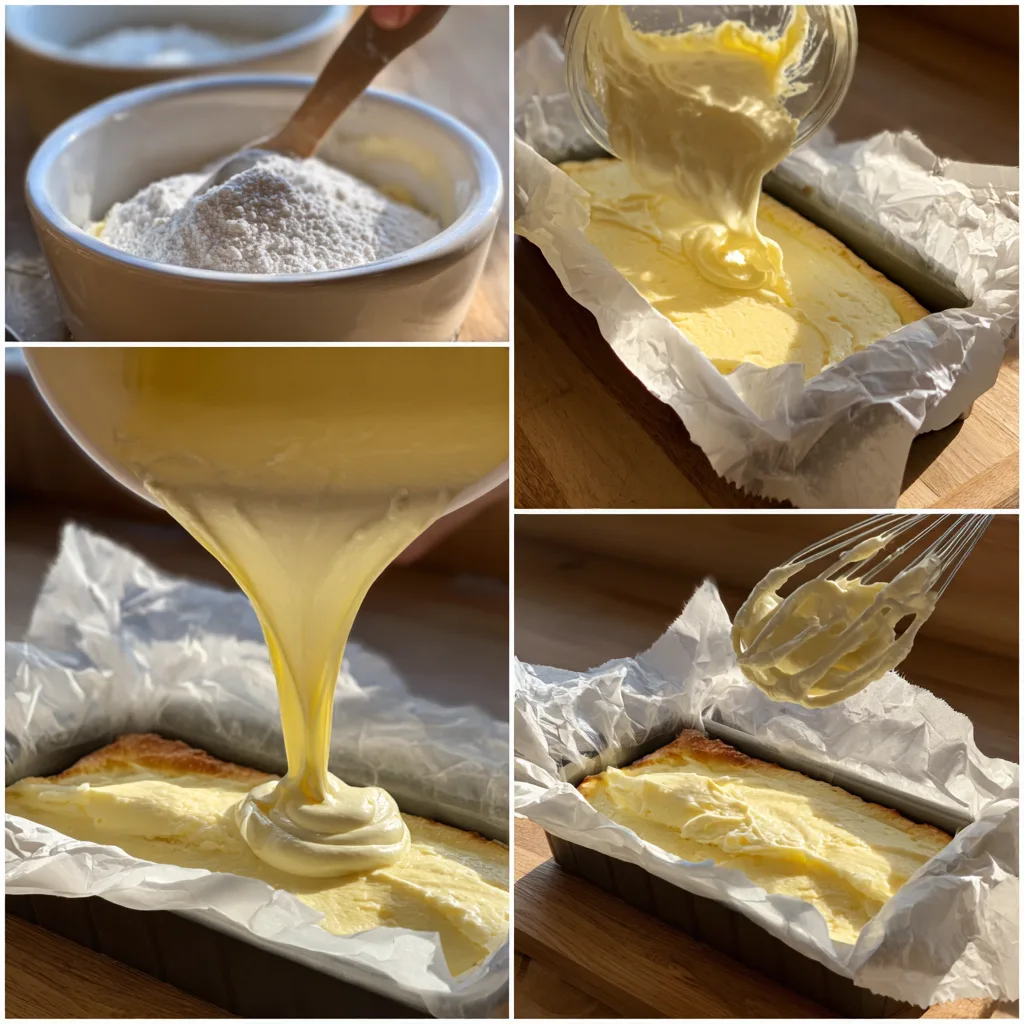
- Add the flour and salt and whisk until the batter is smooth and lump-free.
- Pour the batter into the prepared loaf pan.
- Bake for 30–35 minutes until the top is deeply browned and the center is still slightly jiggly.
- Remove from the oven and let the cheesecake cool to room temperature.
- Chill in the refrigerator for at least 4 hours or overnight before slicing and serving.
Notes
- The center should remain slightly jiggly when removed from the oven; it will set while chilling.
- For best texture, allow the cheesecake to sit at room temperature for 15–20 minutes before serving.
- Using room temperature cream cheese prevents lumps in the batter.
- Parchment paper should extend above the pan edges to accommodate the cheesecake rising during baking.
- Prep Time: 15 minutes
- Cook Time: 35 minutes
- Category: Dessert
- Method: Baking
- Cuisine: Spanish
Why You’ll Love This Recipe
This cheesecake stands out for its simplicity and bold flavor. Unlike classic cheesecakes that require precision, this recipe embraces a rustic approach. The dark caramelized top adds depth while the interior remains smooth and creamy.
Another reason to love this recipe is the loaf pan format. It makes the cheesecake easier to bake, slice, and store. You don’t need a springform pan, complicated crust, or water bath.
The ingredients are simple pantry staples, and the preparation takes only a few minutes. Once the cheesecake is baked, the texture becomes incredibly silky after chilling.
Finally, the flavor is rich yet balanced. The slight bitterness from the burnt top contrasts beautifully with the sweet, creamy filling. Whether you serve it plain or with fresh berries, it’s guaranteed to impress.
Ingredients
(Tip: You can find the complete list of ingredients and their measurements in the recipe card below.)
Cream Cheese
Cream cheese is the star of this recipe and provides the cheesecake with its rich, creamy texture. It’s best to use full-fat cream cheese because it creates the smooth and luxurious consistency that Basque cheesecake is known for. Allow the cream cheese to soften at room temperature before mixing. This ensures the batter blends smoothly without lumps. When I tested this recipe, I noticed that slightly warmer cream cheese creates a silkier filling.
Granulated Sugar
Granulated sugar sweetens the cheesecake and helps create the caramelized surface during baking. The high baking temperature causes the sugar on top to brown deeply, forming the signature burnt crust. The sweetness also balances the slight bitterness of the dark top layer.
Eggs
Eggs provide structure and richness. They help the cheesecake set while maintaining its custard-like center. Adding the eggs one at a time allows the batter to incorporate them evenly, resulting in a smoother texture.
Heavy Cream
Heavy cream contributes to the ultra-creamy consistency of the cheesecake. It lightens the dense cream cheese base and creates the soft, melt-in-your-mouth texture that makes Basque cheesecake so irresistible.
All-Purpose Flour
A small amount of flour helps stabilize the cheesecake. It slightly thickens the batter and ensures the loaf holds its shape when sliced, while still keeping the interior tender and creamy.
Vanilla Extract
Vanilla extract enhances the flavor of the cheesecake and adds warmth to the overall taste. Even a small amount elevates the dessert and rounds out the sweetness beautifully.
Salt
Salt balances the sweetness and intensifies the creamy flavor of the cheesecake. Just a pinch makes a noticeable difference and helps prevent the dessert from tasting overly sweet.
Directions
Start by preheating your oven to 425°F (220°C). Line a loaf pan with parchment paper, allowing extra paper to hang over the edges. This helps you easily lift the cheesecake out of the pan once it cools.
In a large mixing bowl, beat the softened cream cheese until smooth and creamy. This step is important because any lumps in the cream cheese will remain in the batter. Gradually add the granulated sugar and mix until the mixture becomes silky and well combined.
Add the eggs one at a time, mixing well after each addition. This allows the batter to stay smooth and prevents overmixing. Once the eggs are fully incorporated, pour in the heavy cream and mix until the batter becomes light and glossy.
Next, sift in the flour and add the vanilla extract and salt. Stir gently until everything is fully combined and the batter looks smooth and pourable.
Pour the cheesecake batter into the prepared loaf pan. The batter should fill most of the pan but still leave a little space for expansion during baking.
Bake the cheesecake for about 30–35 minutes. The top should become deeply golden to dark brown, almost burnt, while the center will still jiggle slightly when shaken.
Remove the cheesecake from the oven and allow it to cool at room temperature before transferring it to the refrigerator. Chill for at least four hours or overnight for the best texture.
Once chilled, lift the cheesecake out of the loaf pan using the parchment paper and slice into thick, creamy portions.
Equipment needed : Must-Have Tools to Get Rolling
Here’s what you’ll want to have on hand:
Silicone Spatula – Durable, heat-resistant silicone spatula perfect for mixing, scraping, and spreading. Gentle on non-stick cookware and easy to clean.
Large pot – You’ll need this to boil the whole cabbage head and soften the leaves.
large bowl –Spacious, durable large bowl ideal for mixing, serving, or food preparation. Made from sturdy material and easy to clean.
Sharp knife – For coring the cabbage and slicing out the thick stem in each leaf. A paring knife works best.
Mixing bowl – A big bowl makes it easier to combine your meat and rice filling evenly.
Cutting board – For prepping cabbage leaves and rolling them like a pro.
Full-Size Blender – is a powerful kitchen appliance for making smoothies, soups, and sauces in large batches.
3-in-1 Air Fryer – This versatile 3-in-1 air fryer offers Air Fry for healthier meals with less oil, Bake for bakery-quality desserts and treats, and Reheat to bring leftovers back to life with crispy, flavorful results
Servings and timing
This recipe typically yields about 8 servings when baked in a standard loaf pan. Preparation takes approximately 15 minutes, baking requires around 30–35 minutes, and chilling time is at least 4 hours for the best texture.
Storage/reheating
Burnt Basque Cheesecake stores well and actually improves in texture after chilling. Keep the cheesecake covered in the refrigerator for up to four days.
For best results, store slices in an airtight container to prevent them from absorbing other refrigerator odors.
This cheesecake is usually served chilled or slightly cool, so reheating is not necessary. However, if you prefer a softer texture, let a slice sit at room temperature for about 10–15 minutes before serving.
Freezing is also possible. Wrap individual slices tightly in plastic wrap and store them in a freezer-safe container for up to two months. Thaw overnight in the refrigerator before serving.
Variations and Customizations
One of the best things about Burnt Basque Cheesecake is how adaptable it can be. The base recipe is simple, which means it works well with a variety of flavors and adjustments.
For a citrus twist, you can add lemon zest or orange zest to the batter. The bright citrus flavor cuts through the richness of the cheesecake and adds a refreshing contrast. I tried adding lemon zest once, and it gave the cheesecake a subtle brightness that paired beautifully with the caramelized top.
Chocolate lovers can mix melted dark chocolate into the batter before baking. This creates a deeper, more indulgent dessert while maintaining the creamy texture.
Another delicious variation is adding espresso powder or a small amount of brewed coffee to the batter. The slight bitterness complements the burnt top and enhances the overall flavor.
You can also experiment with toppings. Fresh berries, berry compote, or a drizzle of honey can add extra flavor and visual appeal. Some bakers enjoy sprinkling powdered sugar on top just before serving.
For a slightly lighter version, you can substitute part of the heavy cream with Greek yogurt. This adds a subtle tang and slightly reduces the richness while still maintaining a creamy texture.
Finally, you can add a simple crust if you prefer more structure. A quick graham cracker crust pressed into the loaf pan before adding the batter creates a delicious contrast between crunchy and creamy textures.
Nutrition and Dietary Info
| Nutrient | Amount per Serving |
|---|---|
| Calories | 420 |
| Protein | 7 g |
| Carbohydrates | 26 g |
| Fat | 33 g |
| Saturated Fat | 19 g |
| Fiber | 0 g |
| Sugar | 22 g |
| Sodium | 260 mg |
Expert Tips & Customizations
Use Room Temperature Ingredients
Room temperature cream cheese and eggs create a smoother batter and prevent lumps.
Do Not Overmix
Overmixing incorporates too much air into the batter, which can cause the cheesecake to crack or collapse.
Line the Pan Well
Allow parchment paper to extend above the loaf pan so the cheesecake can easily be lifted out.
Expect the Dark Top
The dark surface is intentional and adds a signature caramelized flavor.
Chill for Best Texture
Although it can be eaten sooner, chilling the cheesecake overnight creates the creamiest consistency.
FAQs
Why is it called Burnt Basque Cheesecake?
The cheesecake gets its name from its deeply caramelized top. The dark surface develops from baking at a high temperature, creating a rich flavor that balances the creamy filling.
Can I make this cheesecake without flour?
Yes, some versions omit flour entirely. However, a small amount helps stabilize the loaf pan version and makes slicing easier.
Why is the center still jiggly after baking?
The center should remain slightly jiggly because it continues to set while cooling and chilling in the refrigerator.
Can I use a different pan instead of a loaf pan?
Yes, a small round cake pan or springform pan can be used, but baking time may need slight adjustments.
How do I know when the cheesecake is done?
The top should be deeply browned and the center should still have a slight wobble when the pan is gently shaken.
Can I freeze Burnt Basque Cheesecake?
Yes, the cheesecake freezes well. Wrap slices tightly and store them in the freezer for up to two months.
Conclusion
Burnt Basque Cheesecake in a loaf pan is a simple yet elegant dessert that delivers rich flavor with minimal effort. The caramelized top, creamy center, and rustic appearance make it stand out from traditional cheesecakes.
Because the recipe is so forgiving, it’s perfect for both beginner bakers and experienced home cooks. With just a few ingredients and straightforward steps, you can create a bakery-quality dessert right in your kitchen.
Whether served plain, topped with berries, or customized with different flavors, this cheesecake is guaranteed to become a favorite treat for any occasion.
Hungry for more? Visit our website for full recipes and follow us on Pinterest for daily foodie inspo you’ll love to pin!